Icewine

28 01 2009


A sample of ice wine at Peller Estates

A sample of icewine at Peller Estates


The expression “When life gives you lemons, make lemonade” may be a bit of a cliché but when it comes to Canadians and winter weather, it’s an apt metaphor for what we do.  Except instead of lemonade, we’re making icewine.

Icewine was first made in Germany, where it is known as ‘eiswein’.  It involves leaving grapes on the vines to freeze which concentrates the sugars.  When pressed, the grapes yield a sweet, viscous nectar that is reminiscent of fruit and honey.  While Germany may lay claim to icewine’s roots, Canada has become a top producer with Canadian wineries regularly winning awards at international competitions.  To learn more about how Ontario icewines are made, visit www.ontariograpes.com.

Each winter, the Niagara wine region in Southern Ontario holds an icewine festival and this year I had the pleasure of attending some of the events.  A number of wineries hosted special tastings with activities and entertainment.  The main street of Niagara-on-the-Lake was blocked off to make way for a number of booths featuring samples from local winemakers and small bites from area restauranteurs.  

An outdoor ice bar

An outdoor ice bar


Our day got off to a late start but it’s only a short drive to the Niagara region from Toronto (just over an hour, if traffic is good). We stopped at Flat Rock Cellars and sampled a couple of their vintages.  They were also selling icewine marshmallows for toasting over the outdoor fire and their pond had been cleared for skating but unfortunately the ice conditions were poor so no one was out.  We moved on to Peller Estates who were hosting their tastings at an outdoor ice bar.  They featured icewines made from three different grapes: cabernet franc, vidal and riesling.  Like Flat Rock, Peller was also offering icewine marshmallows on sticks for toasting over fire pits. The toasted marshmallows were certainly better than anything you can buy in a bag but they were extremely sweet!  To finish off, Chef Jason Parsons was offering his signature icewine infused white hot chocolate.  It was the perfect drink to warm up with on a cold day.

Icewine marshmallows, ready for toasting over the fire

Icewine marshmallows, ready for toasting over the fire


Finally we went into town for the main event.   At the Fallsview Casino Icewine Lounge local restaurants were offering up small plates of their fare and icewine was flowing freely.   Tokens were for sale at the entrance and samples typically cost between one and three tokens.  There was entertainment and ice sculptors were wielding their chainsaws, producing temporary works of art.  The most popular booth was the 20 Bees martini bar, which featured icewine martinis poured down an ice chute, ensuring the drinks were ice cold by the time they hit your glass (see recipe for the cocktail below).   The food offered was very hearty including pork and beans, squash soup and a Provençal duck stew. 

Icewine martinis are poured through an ice chute

Icewine martinis are poured through an ice chute


The festival is held each year and runs for two weekends.  For information on planning a trip next year, visit www.niagarawinefestival.com.  It’s a unique way to experience wine country in the off-season.   A weekend of fine dining, great wine and perhaps a visit to the casino or a spa is the perfect way to chase away the mid-winter blues!


An ice sculptor at work

An ice sculptor at work


Entertainment at the festival

Entertainment at the festival


If you aren’t able to make it to the festival, you can still get into the spirit at home. Niagara icewine is available around the world (I once saw some in a wine shop in Rome), although it’s not cheap.  However, on occasion it’s an indulgent treat that’s worth the splurge.  For more icewine cocktails, click here: Peller Estates Icewine Cocktails.

Icewine Cocktail

As featured at the 20 Bees booth at the 2009 Niagara Icewine Festival

Makes 1 (strong) drink, can easily be doubled.

  • 2 ounces Skyy Vodka
  • 1 ounce 20 Bees Icewine

Chill a cocktail shaker in the freezer.  Combine a scoop of ice cubes, the vodka and icewine.  Shake well and strain into a chilled wineglass or martini glass.

An ice wine martini

An icewine martini


Icewine Jelly

This makes a great accompaniment to a cheese plate.  

Makes approximately 3/4 cup of jelly

  • 1 cup icewine
  • 1 package Certo pectin
  1. In a medium saucepan, combine icewine and pectin.  Stir to combine and bring to a boil on high heat.
  2. Reduce heat to medium and simmer for 15 minutes, until jelly begins to thicken.  Pour into a container and refrigerate until jelly cools and sets, at least 1 hour.
  3. Serve with cheeses, foie gras, etc.


Ice wine jelly with Comfort Cream cheese and crackers

Icewine jelly with Comfort Cream cheese and crackers


Bon Appétit and Enjoy!


New Feature – Essential Recipes

21 01 2009

istock_000003137570xsmall

I’m debuting a new feature here at The Seasonal Gourmet: Essential Recipes.  This is a page that can be found at the top of the site, beside ‘My Reading List’.  It’s an on-going project to build a library of basic recipes that will be building blocks for a better finished project.  It will (eventually) include pastry, stocks and classic sauces. Be patient – it’s a work in progress so I’ll be adding the information over time.   If a recipe on the main site requires one of the Essential Recipes, I will provide a link to the page. 

Enjoy!

Trish


Apple Pie

20 01 2009


The White House at night

The White House at night

Today is a historic day in the United States.  The whole world is watching the inauguration of President Barack Obama so why not mark the occasion with a special menu to celebrate?  The official menu for the inauguration luncheon includes Seafood Stew, Duck Breast with Cherry Chutney, Herb Roasted Pheasant with Wild Rice Stuffing, Molasses Whipped Sweet Potatoes, Winter Vegetables and Cinnamon Apple Sponge Cake.  You can get the recipes here:  Recipes from the 2009 Inaugural Luncheon.  

If you’d rather make something simpler but still quintessentially American, why not bake an apple pie?  It’s easy to put together and is always a crowd pleaser (especially with a scoop of vanilla ice cream!).  Apples are considered ‘in season’ right now because the autumn harvest can be stored through the winter.  I used MacIntosh apples but you can use any kind of medium-tart apple including Cortlands, Gravensteins or even Granny Smiths.    Nothing beats homemade pastry but in a pinch you can use pre-made frozen (uncooked) pie crust.  Just be sure to thaw it well before assembling the pie.

All-American Apple Pie

Makes one 10″ double crust apple pie

Basic Double Crust Pastry

The secret to good pastry is to handle it as little as possible and keep ingredients cold.  The measures for ice water are not exact – add what you need to get the dough to stick together without being too wet.

  • 2 cups all-purpose flour
  • 1/2 teaspoon baking powder
  • 1/4 teaspoon salt
  • 1/3 cup shortening
  • 1/3 cup butter
  • Approximately 16 to 18 Tablespoons of ice water  – Prepare a bowl of ice water and use more or less as needed


  1. In a large mixing bowl, add flour, baking powder and salt.  Stir together to combine.
  2. Cut shortening and butter into small pieces and add to dry mixture.  Using a pastry cutter, cut into flour until it resembles coarse crumbs.
  3. Spoon ice water into mix, adding it a little at a time.  Stir pastry dough every few tablespoons and stop adding water once the pastry can form a ball.
  4. Cut ball of pastry in half.  Sprinkle a clean countertop with about 1/8 cup flour and place half of the dough on the counter.  Press on dough ball until it is a flattened disk.  Sprinkle a spoonful of flour over pastry disk.
  5. Working from the centre of the pastry disk, moving outward toward the edges, roll out pastry until it is thin.  It will be larger in diameter than you need but can be trimmed to fit.
  6. Carefully move the pastry to your pie plate (fold pastry circle in half and then in half again so it is folded into quarters).  Press into pie plate.  Repeat rolling process with top crust.  If making pastry in advance, cover loosely with a damp paper towel and plastic wrap and refrigerate until ready to use.

Apple Pie Filling

Apples can vary in sweetness so the amount of sugar may need to be increased or decreased.  Taste a piece of the apple mix before baking.  If it seems a bit tart, add a little more sugar.

  • 6 medium  apples, peeled, cored and cut into chunks (about 4 cups of apple chunks)
  • Approximately 3 to 4 Tablespoons sugar + an additional 1 teaspoon sugar
  • 1 teaspoon cinnamon
  • 1/4 teaspoon nutmeg
  • 1/8 teaspoon allspice
  • 1 Tablespoon flour


  1. In a large bowl, combine apples, 3 to 4 Tablespoons sugar (or to taste), cinnamon, nutmeg, and allspice.  Using your hands, mix together until the apples are evenly coated.  
  2. Sprinkle in flour and mix again until fruit is coated.  Refrigerate until ready to use.

Assembling the Pie

  • Pastry (see recipe above)
  • Apple Filling (see recipe above)
  • 1 Tablespoon unsalted butter


  1. Preheat oven to 375 degrees Fahrenheit.
  2. Spoon apple mixture into unbaked bottom crust. Cut butter into small pieces and dot the top of the apple mix.
  3. Moisten edge of bottom crust with water and lay top crust over filling.  With a sharp knife, trim any overhanging pastry.  Crimp together the bottom and top crusts, making sure to seal it well.
  4. Sprinkle the top of the pie with 1 teaspoon sugar.  Cut two or three slashes in the top of the pastry so steam can escape.
  5. Bake for about 1 hour or until the pastry is browned on top and the filling is bubbling.
  6. Serve with vanilla ice cream, lightly sweetened whipped cream or a slice of cheddar cheese.


Apple pie with flaky homemade pastry and vanilla ice cream - perfect for an Inauguration Celebration!

Apple pie with flaky homemade pastry and vanilla ice cream - perfect for an Inauguration Celebration!

Bon Appétit and Enjoy!


Maple Nut Oatmeal

14 01 2009

istock_000004901590xsmall

When it comes to breakfast a lot of people just eat the same thing every morning: maybe some cereal or toast, a piece of fruit or an egg and some coffee.  However, breakfasts can be seasonal meals, reflecting the weather and what’s available at the markets.  In the summer, an omelette with fresh herbs and tomatoes served outdoors hits the mark while in winter we might prefer something a bit heartier on cold mornings.

This morning it is -22 degrees Celsius here so clearly something warming is in order. A bowl of hearty oatmeal with toasted nuts and a hint of maple fits the bill perfectly. By using quick cooking oatmeal, you can have breakfast on the table in minutes without a lot of fuss.  While oatmeal is often sold in single-serve, flavoured packets, I prefer to add my own seasonings.  It allows you to control the ingredients so you’re not eating a lot of weird additives and you can sweeten it to your taste (it’s much more economical as well!).  You can adjust the maple syrup in this recipe depending on how sweet you prefer your oatmeal.

Maple Nut Oatmeal

Makes 1 serving (can easily be multiplied)

(VEGETARIAN)

  • 1/3 cup quick cooking oats
  • 2/3 cup water
  • Dash of salt
  • 1 teaspoon brown sugar
  • 2 Tablespoons chopped toasted walnuts OR pecans
  • 2 teaspoons maple syrup
  • Whole nuts for garnish (optional)
  1. In a saucepan, add oats, water, salt, brown sugar, nuts and 1 teaspoon maple syrup.  Stir to combine.
  2. Bring mixture to a boil and cover.  
  3. Turn heat to low and let simmer for 5 minutes.  
  4. Remove from heat, stir and drizzle remaining 1 teaspoon of maple syrup over oatmeal. Garnish with whole nuts and serve.


Maple Pecan Oatmeal on a cold winter morning

Maple Pecan Oatmeal on a cold winter morning

Bon Appétit and Stay Warm!


Sausage and Mushroom Lasagna

11 01 2009
p1020091_2_21

Grey winter days call for classic comfort foods like lasagna


Happy New Year to everyone!  It’s been a while since I’ve posted any new recipes because of the holidays, some traveling and a pesky flu that took me out of commission briefly.  However, I’m full of ideas for 2009 and I will be focusing on interesting uses for local produce, various cooking techniques and a commitment to somewhat healthier and lighter cooking (but there will still be some decadent treats as well!)

Today’s recipe doesn’t exactly fall into the ‘light’ category.  However, it is delicious and despite the numerous steps, quite easy to pull together.  And it can be made in advance so it’s the perfect dish to serve for entertaining – you can assemble it the night before and just pop it into the oven as your guests arrive.  You can serve with a salad and light dessert such as fruit and gelato to cut the richness and create a balanced menu.  It’s the perfect comfort food for a cold winter night!

A note about lasagna noodles:  Using fresh noodles (either store-bought or homemade) makes assembling the dish easy and yields the best result.  However, if you can’t find fresh noodles, you can either use oven-ready dried noodles or regular dried lasagna noodles.  If using regular dried noodles that need to be cooked in advance, boil for only half the recommended time. There is enough moisture in the sauce to finish cooking the noodles and you will avoid overcooked, mushy noodles.

Sausage and Mushroom Lasagna

Makes 6 to 8 servings

Sausage and Mushroom Sauce:

  • 2 Tablespoons extra virgin olive oil
  • 1 medium onion, diced
  • 1 garlic clove, chopped
  • 10 medium button or cremini mushrooms, cut into 1/2″ thick slices (about 2 cups of sliced mushrooms)
  • 4 mild or sweet Italian sausages, casings removed (see Kitchen Tip of the Week for an efficient method)
  • 28 fl.oz / 796 ml can of good quality canned tomatoes
  • 1 Tablespoon fresh chopped  oregano OR 1-1/2 teaspoons dried 
  • 1/2 teaspoon red pepper flakes (or to taste)
  • 3 Tablespoons tomato paste
  • 1 teaspoon sugar, or to taste
  • Salt and pepper, to taste

Béchamel Sauce:

  • 4 Tablespoons unsalted butter
  • 1/4 cup flour
  • 2-1/2 cups milk (2% or whole)
  • 1/4 teaspoon grated nutmeg
  • Salt, to taste

Assembly:

  • 5 or 6 fresh lasagna noodles (store-bought or homemade – see note about noodles above)
  • 5 oz / 140 g grated or thinly sliced mozzarella (about 1-1/2 cups packed shredded cheese)
  • 1/4 cup freshly grated parmesan cheese


Sausage and Mushroom Sauce:

  1. In a large, deep skillet or enameled cast iron pot, heat 1 Tablespoon olive oil on medium-high heat.  Add onion and sauté until transparent, about 3 to 4 minutes.  Add garlic and cook for another 30 seconds.
  2. Add mushroom slices.  Saute for about 8 minutes or until they are beginning to brown.  Remove mushrooms and onion from pan and set aside.
  3. Add the final Tablespoon of olive oil to pan.  Add sausage and turn heat to medium-high.  Break up sausage meat with a spatula and cook until just browned, about 5 minutes.
  4. Return mushroom/onion mix to pan and add oregano and red pepper flakes.  Stir to combine ingredients.  Add canned tomatoes and break up with a spoon.  
  5. Let sauce simmer on medium heat for 20 minutes.  While sauce is simmering, prepare Béchamel Sauce (see below).
  6. After sauce has simmered for 20 minutes, stir tomato paste into sauce until thoroughly incorporated.  Season with sugar, salt and pepper to taste.  Simmer for another 10 minutes.  Note: this sauce is delicious on it’s own with penne or rigatoni!

Béchamel Sauce:

  1. In a large saucepan, heat butter on medium heat until just melted.  Whisk in flour, making sure it is fully incorporated into the butter.  Cook flour/butter mixture for about 2 minutes, whisking constantly.  
  2. Add 1/2 cup milk, whisking briskly as you pour it.  Mix well into the flour and butter, ensuring it makes a smooth sauce with no lumps. Continue to add the rest of the milk slowly, 1/2 cup at a time, whisking constantly.
  3. Cook sauce for about 5 to 7 minutes or until it begins to thicken.  Do not let the milk boil or burn.  Add nutmeg and season with salt to taste.

Assembling the lasagna:

  1. Heat the oven to 425 degrees Fahrenheit.  
  2. In a 9″ X 12″ X 3″ deep (approximately) baking dish, spread a scoopful of sausage sauce so it covers the bottom of pan in a thin layer (about 1 cup of sauce).   Spoon about 1/2 to 3/4 cup béchamel sauce over sausage mix.   Cover sauces with a single layer of fresh noodles, cut to fit as necessary (it may require cutting up a couple of noodles to fit along the edges properly).  
  3. Repeat layering: sausage mix/béchamel/noodles, sausage mix/béchamel/noodles, sausage mix/béchamel. Do not top with a final layer of noodles. 
  4. If baking immediately*, sprinkle top layer with mozzarella and parmesan cheeses, making sure they are evenly distributed.  Bake for about 30 minutes or until the cheese is bubbling and browned.  If lasagna has been refrigerated, it may take a little bit longer to brown so adjust baking time accordingly.
  5. Serve with a green salad and a nice Italian red wine.

*Note for making lasagna in advance: if you are making it to bake at a later time, do not add cheese until just before cooking or it will dry out.  Cover with saran and refrigerate until ready to bake. 

Bon Appétit and Enjoy!

p10201271

Sausage and Mushroom Lasagna with a green salad


2009 Seasonal Gourmet Day Planners – Now Available!

10 01 2009

Great news!  You can now order a 2009 Seasonal Gourmet 365-day planner and calendar.  Featuring the best of 2008’s kitchen tips, seasonal ingredients, over 150 photos and 20 recipes, you can keep track of appointments in style.  Or use it as a journal, to record your most memorable moments of the year.

Click on the icon below to preview the book.  It’s the perfect gift for food lovers – order your copy today!

Daily Calendar & Pl…
By Trish Coleman


Jamie Kennedy Wine Bar

9 01 2009

istock_000006170852xsmall

I don’t typically do restaurant reviews here at The Seasonal Gourmet, aside from occasionally discussing restaurants I’ve tried in my travels.  Reviewing restaurants isn’t my area of expertise and there are other great websites dedicated to providing reviews. However, I feel that a recent meal I enjoyed should be discussed as a great example of seasonal eating at its best.

As everyone knows, winter seasonal eating in northern climates is not without its challenges.   It’s been a long time since the farmer’s markets of summer and we have a while to go before the first crops of spring.  Jamie Kennedy is a renowned chef who owns a number of restaurants in Toronto and was an early champion of local, seasonal eating in Ontario.  My favourite of his restaurants is the Wine Bar, located on Church Street downtown.  It’s casual and inviting with exposed brick walls, bottles of preserves on display and an open kitchen at which you can sit and watch the chefs in action.  The menu is composed of dishes made from local, seasonal ingredients and served as small portions for sharing.  I like this style of eating (it’s similar to Spanish tapas) because it allows you to try a number of different things.  The menu changes daily and wine pairings are suggested for each course. 

I’ve visited JKWB (Jamie Kennedy Wine Bar) many times and I always come away both satisfied and inspired.  It’s not fancy food – many of the dishes are rustic preparations such as braises and his most famous dish is french fries – but I always find something on the menu that interests me as a cook and recipe developer.  A recent meal was no exception.  


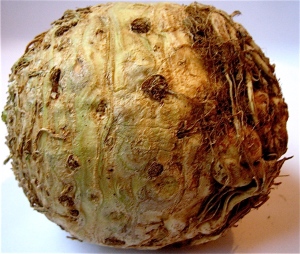
Celery Root

Celery Root


We started with a plate of house made flatbreads with three kinds of dips: Leek with White Bean, Parsnip-Maple and Celery Root.  All were delicious but my favourite was the celery root – it was creamy with a hint of celery flavour.  We then moved on to a bowl of Cabbage and Parsnip Soup.  While this sounds like something eaten by orphans in a Dickens novel, it was actually a rich, creamy, complex soup that was a little different from winter soups offered in most restaurants.  I look forward to trying my own rendition of it.  


Parsnips

Parsnips


After a great start, we continued with more hearty dishes (bear in mind the portions are small and each dish was shared!). Seared Scallops with Braised Leeks and Smoked Pork Shoulder arrived perfectly cooked, followed by a Braised Beef Cheek with Roast Potatoes that was meltingly tender with a hint of rosemary.   The final main dish was Duck Confit with Buttered Turnip.  Again, it sounds boring but the turnip was almost sweet and paired well with the crisp skinned duck.   To finish the meal, we tried the Sticky Toffee Pudding with Chantilly.  The moist cake with toffee sauce and cream may have been the highlight of the meal.

Other tempting items on the menu that we didn’t try included Grilled Albacore Tuna with Beets and Mustard Vinaigrette, Entrecote of Beef with Northern Woods Mushrooms and Local Organic Fries as Braised Beef Poutine.  All of the dishes used seasonal vegetables and local purveyors where possible.  The result was innovative and most importantly, delicious.

And that, my friends, is how you can eat well with the season in the heart of a Canadian winter.

  • Jamie Kennedy Wine Bar
  • 9 Church Street, Toronto, Ontario
  • 416-362-1957
  • Wine Bar Chef: Dan DeMatteis
  • Pastry Chef: Rachelle Cadwell
  • Executive Chef: Jamie Kennedy