Vietnamese-Style Rice Noodles with Spicy Pork

4 09 2011

Vietnamese-Style Rice Noodles with Spicy Pork

It may be September but don’t be fooled by the calendar – it’s still summer and many areas continue to be hot and humid! A refreshing Vietnamese-inspired noodle dish with crisp vegetables, fresh herbs and spicy pork is the perfect dish to cool down with.

A Note About Ingredients

When I first started this site, just over three years ago, my goal was to present recipes with ingredients that were accessible to most people in North America, whether they lived in large cities or rural areas (like most of my family does). At the time, that meant that anything remotely exotic had to be excluded. However, over the past couple of years, even grocery stores in small towns now carry ingredients from around the world (well, not every small town, but the situation is improving in most places!). The ingredients for this recipe should be readily available anywhere with the possible exception of fish sauce (nuoc mam), rice vermicelli (banh pho) and oyster sauce. Any city with a large Asian population will have markets where you can buy these items; in smaller centers check the rice isle and condiment section (some stores also place imported items under ‘Ethnic Foods’).  A Taste of Thai and Thai Kitchen brands are often carried in large supermarket chains. For substitutions, check out the Cook’s Thesaurus: Asian Condiments.

Some Vietnamese and Thai pantry basics: (from left) Thai fish sauce, rice vermicelli (banh pho), Three Crabs brand fish sauce, Thai rice stick noodles, oyster sauce.

Note: This recipe should be suitable for gluten-free diets, however, check the label of the fish sauce and oyster sauce to ensure that no gluten was used in their preparation.

Vietnamese-Style Rice Noodles with Spicy Pork

Makes 4 to 6 servings

This recipe is a little long and requires a bit of prep work but it’s very simple if you take it step-by-step. You will need about three limes total for the juice and garnish. Be sure to use fresh herbs to garnish – they will make the dish come together.

Dressing:

  • 3 Tablespoons fresh lime juice
  • 1-1/2 Tablespoons fish sauce (preferably Three Crabs brand but any kind will do)
  • 3 Tablespoons vegetable oil (canola or safflower work well)
  • 1-1/2 Tablespoons sugar
  • 2 large cloves garlic, very finely minced
  • 3 Tablespoons very finely minced shallot
  • 1 teaspoon red pepper flakes
  • Pinch of salt
  1. In a small bowl or measuring cup, add all ingredients and whisk until combined. Set aside until ready to use.

Spiced Pork:

  • 2 teaspoons vegetable oil
  • 450 g / 1 lb. lean ground pork
  • 2 cloves garlic, very finely minced
  • 1 medium shallot, minced
  • 3 Thai bird chiles, finely minced or 1-1/2 teaspoons red pepper flakes (or to taste)
  • 3 X 1” pieces lemongrass (eliminate if you can’t find it)
  • 1 Tablespoon fresh lime juice
  • 1 Tablespoon oyster sauce
  • 1 Tablespoon fish sauce
  • 2 teaspoons brown sugar
  • 1 teaspoon coarsely ground black pepper
  • Salt, to taste
  1. In large skillet, heat the vegetable oil on medium-high heat. Add the ground pork and use a spatula to break it up. Cook for one minute.
  2. Add the garlic, shallot, chiles and lemongrass pieces. Stir into the pork until thoroughly combined. Cook the mixture until the pork is just past pink, about 5 to 7 minutes.
  3. Add the lime juice, oyster sauce, fish sauce, brown sugar and pepper. Stir to combine. Reduce the heat to medium and let simmer for another two minutes. Remove the lemongrass pieces and discard.
  4. Season the pork mixture with salt and set the mixture aside until ready to use.

Noodles and Vegetables:

  • 12 oz. / 340 grams dry rice vermicelli noodles (banh pho – about 3 mm wide – if these aren’t available any kind of flat rice noodle will work)
  • 1 medium English cucumber
  • 1 medium carrot
  • 1 medium red pepper
  • 1 cup bean sprouts or ½ cup shredded lettuce
  1. To prepare the noodles: Bring a pot of water to a boil. Drop in the dry noodles and cook for about 3 minutes or until just tender. Drain and rinse with cold water to halt the cooking. Place in a bowl and set aside until ready to use.
  2. To prepare the vegetables: Slice the cucumber into rounds, about   1/8“ thick. Discard the ends.
  3. Peel the carrots and cut into thin matchsticks and cut the red pepper into thin strips.

Garnishes:

  • Fresh cilantro
  • Fresh mint
  • ¼ cup dry roasted peanuts, chopped
  • Fried shallot rings (see below)
  • 1 lime, cut into 6 wedges

Fried Shallot Rings:

  • 1 medium shallot
  • Vegetable oil – enough to cover the bottom of a small saucepan about ½” deep
  • Pinch of salt
  1. Peel the shallot and slice into thin rings. Heat the oil in a small saucepan on high. Add the shallot rings and fry until golden and crispy, about 3 to 4 minutes. Make sure you don’t overcook them or they will become bitter.
  2. Use a slotted spoon to remove the rings from the oil and set them aside on a piece of paper towel. Sprinkle with a pinch of salt and set aside until ready to use.

Putting it All Together:

  1. Place the softened noodles in a large bowl. Add the sliced cucumber, carrot and pepper strips and bean sprouts.
  2. Pour in the dressing and toss until everything is coated and thoroughly combined.
  3. Plate the noodles and top with the spiced pork. Garnish with torn fresh coriander and mint, chopped peanuts and fried shallot rings. Serve with lime wedges on the side to squeeze over the dish when served.
  4. The dish can be served warm or at room temperature.

Bon Appétit and Enjoy!

Get updates from The Seasonal Gourmet on Facebook and Twitter.  Join the conversation today!

Copyright Trish Coleman. Please contact the author to obtain permission for republication.


Burrata with Tomato and Basil

31 08 2011

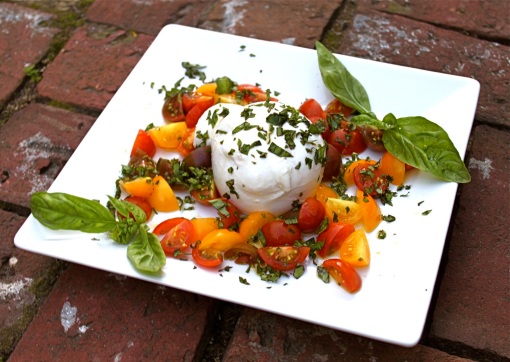
Burrata with heirloom tomatoes and basil makes a great appetizer or first course

With summer produce at its best right now, we can rely on top quality ingredients to keep cooking simple. One classic summer dish that couldn’t be easier is Insalata Caprese – a salad made with fresh mozzarella, tomatoes, fresh basil, olive oil and sea salt. For an interesting twist on a standard caprese salad, why not try it with burrata instead?

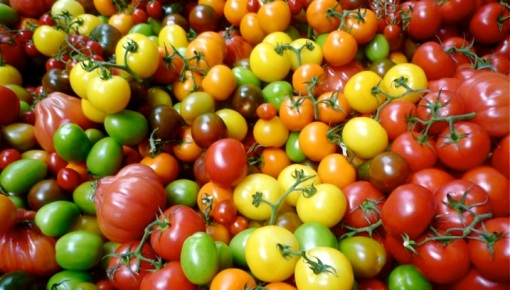
Colourful heirloom tomatoes give the dish visual appeal

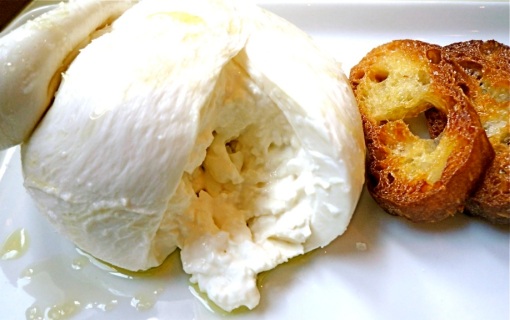
Burrata is a type of fresh mozzarella cheese from Puglia in southern Italy. Each baseball-sized round of burrata is stuffed with mozzarella curds and cream, which spill out once it has been cut. Each ball has a ‘knot’ on top where the cheese was sealed, keeping the cream inside. It is often packaged in a damp wrapping or suspended in liquid to protect it. Burrata is extremely delicate and should be consumed within a few days of production.

Until recently, burrata had to be imported from Italy to North America, however, there are a number of producers now making it in Canada and the United States. In Toronto, I usually buy burrata produced by Quality Cheese or Santa Lucia. It’s usually available at specialty cheese shops including Olympic Cheese, Scheffler’s Deli and the Cheese Boutique. In other areas, a google search should indicate where you can find it (unfortunately it may be difficult to locate outside of urban areas but ask at your local market – they may be able to order it for you).

Fresh basil pairs beautifully with ripe tomatoes

The key to serving burrata is to keep it simple. A simple drizzle with olive oil and a dash of sea salt will suffice but I like to showcase peak season tomatoes and basil to take it to the next level. Prepare some Olive Oil and Sea Salt Crisps to spread it on (see recipe below). Use good quality olive oil, sea salt and the best quality fresh tomatoes and basil you can find. Be sure to bring the burrata to room temperature for a half hour or so before serving. This dish only takes minutes to put together and will be sure to impress your guests as an appetizer or starter dish.

Burrata with Tomato and Basil

  • 1-1/2 to 2 cups good quality tomatoes (any kind will do as long as they are ripe and sweet – heirloom varieties come in many colours and are visually appealing)
  • 4 to 5 large fresh basil leaves, plus extra sprigs for garnish
  • Good quality extra virgin olive oil
  • A pinch or two of sea salt
  • Olive Oil and Sea Salt Crisps (below)
  1. Remove burrata from its packaging and use a clean towel or paper towel to dry it. Set it on a serving platter and let it come to room temperature for at least a half hour before serving.
  2. Chop the tomatoes and basil (to chop basil, see my tip on How to Chop Fresh Herbs)
  3. Place the tomatoes around the burrata and sprinkle with chopped basil. Drizzle a small amount of olive oil over the cheese and tomatoes and season with a pinch or two of sea salt.
  4. Use a knife and spoon to serve on crisps.

Olive Oil and Sea Salt Crisps

Tip: These crisps can be made in advance and stored in an airtight container for a couple of days. However, if you don’t have time to make them, Ace Bakery sells a similar product that works well. You can also serve the burrata with toasted baguette slices or even crackers.

  • 1 baguette
  • 1/4 to 1/2 cup (approximately) extra-virgin olive oil
  • Sea salt
  • 1 clove fresh garlic (optional)
  1. Preheat the oven to 375 degrees Fahrenheit.
  2. Slice a baguette into rounds about 1/2“ thick. Brush both sides of each slice with olive oil and lay in a single layer on a baking sheet.
  3. Bake for 9 to 10 minutes or until the bottoms are golden brown and toasted. Turn crisps over and bake for another 3 to 5 minutes.
  4. Remove from the oven and sprinkle with sea salt. Crisps can be kept in an airtight container for a few days.
  5. To make garlic crisps: Peel a clove of garlic and rub it onto each crisp.

Burrata is delicious served on Olive Oil and Sea Salt Crisps

Bon Appetit and Enjoy!
Get updates from The Seasonal Gourmet on Facebook and Twitter.  Join the conversation today!

Portions of this article first appeared on Suite 101.com. Copyright Trish Coleman. Please contact the author to obtain permission for republication.


Farmers’ Market Report – August 25th, 2011

25 08 2011

A roadside farm stand in the Niagara region

As we near the end of August, farmers’ markets in Ontario are stacked high with summer’s bounty. With the exception of a few spring vegetables, pretty much anything that grows here is now available. It’s almost too much to keep up with! Here are a few of the highlights from my recent market visits:

Tomatoes

I’ve been pleased to discover that this has been a pretty good year for tomatoes in Southern Ontario. Thanks to a hot, dry July, this year’s tomatoes have good flavour. Eatocracy recently did a story about the Best Sandwich in the Universe: a tomato sandwich, simply prepared with white sandwich bread, sliced ripe tomatoes and mayo. It only works in the summer, when tomatoes are at their peak. I don’t disagree that a tomato sandwich is a thing of beauty but my personal favourite is a BLT. The crisp bacon and crunchy lettuce elevate the tomatoes to new heights, in my humble opinion. For more great ideas using tomatoes, check out the Tomato Archives.

Corn

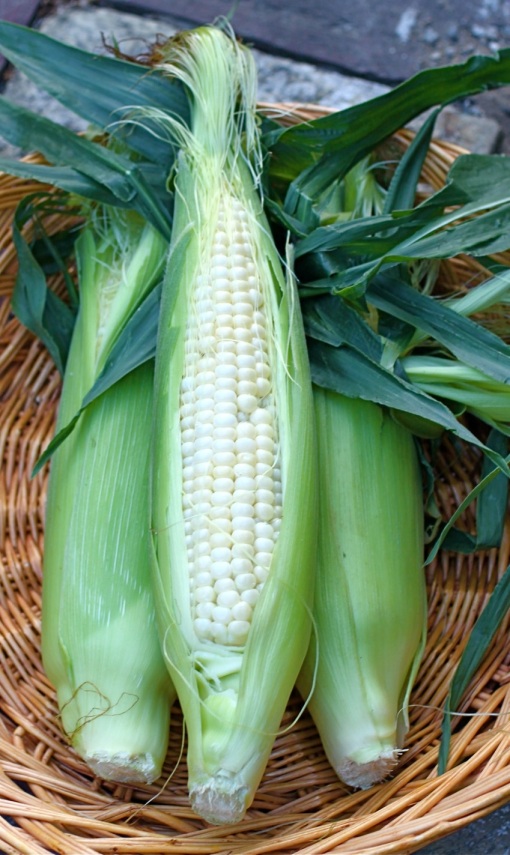
August is the peak month for corn in Ontario

Corn has been plentiful this summer but I’ve had a bit of an issue with some of it. I bought some nice looking cobs at the market a couple of weeks ago and used them to make a pasta dish. Unfortunately, the kernels were a little too sweet (if that’s possible!) and tasted more like sugar bombs than corn, which didn’t really enhance the recipe. However, I bought some cobs last weekend that were much better – still sweet but they had a decent ‘corn’ flavour as well. Simply boiled and dressed with butter, salt and pepper, it was a true taste of August. Why not make some Corn Chowder with Bell Peppers or try Corn Scallop, a delicious side dish for grilled meats.

Peaches

Freshly picked Niagara peaches

Peaches are a staple at Ontario markets this time of year. This year I’ve found them to be flavourful but a little on the small side, which one of the growers told me was because of the dry weather in July. Peach Cobbler is a classic and Peach Tiramisu is a unique twist on an Italian standard. If you’d rather something more savoury, Peach Chutney is a great accompaniment to pork or chicken.

Summer Squash

Zucchini and patty pan squash were abundant at the last market I attended. Luckily the zucchini were still young and tender – they can get watery as they grow large. Smaller summer squash tend to be sweeter and work well in pasta dishes such as Summer Squash with Egg Pasta. Zucchini Bread with Cream Cheese Frosting is a great way to finish the meal – it’s moist, flavourful and the cream cheese frosting makes it special.

Potatoes

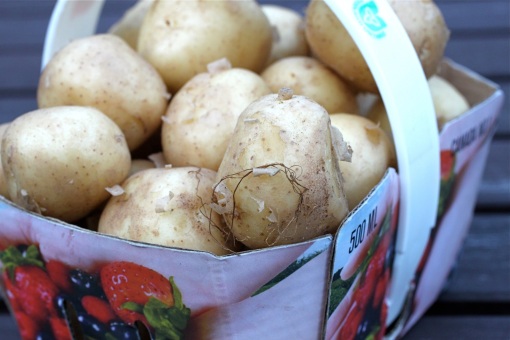
Ontario baby potatoes

Baby potatoes are one of my favourite things. They can be prepared very simply: give them a quick boil or steam and dress with a little bit of butter, salt and chopped parsley (add a little sour cream if you want to be decadent!). Or you could whip up a batch of Baby Red Potato Salad with Mustard Vinaigrette, a mayo-free, zippy potato salad that’s a nice change from the usual (you can use regular white potatoes in place of red).

Basil

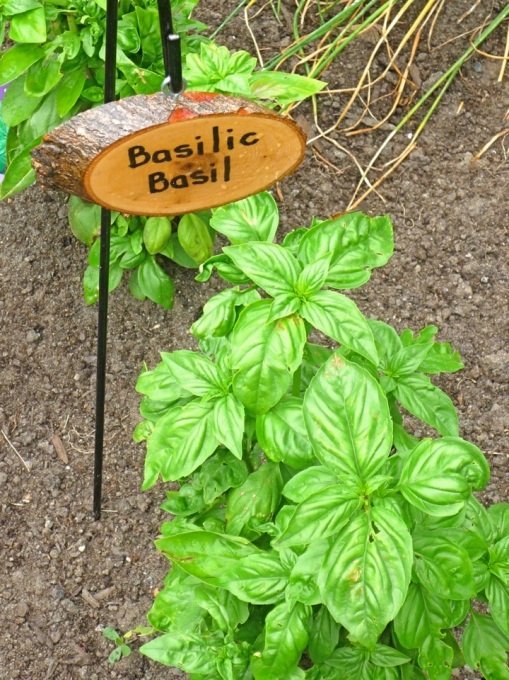
Fresh basil is a fragrant summer treat

It has been a good year for basil, at least for farmers (my personal pot of basil didn’t make it through the heat wave). Every time I have purchased some at the market this summer, people on the street and the bus have commented on how incredible it smells – a taxi driver even asked me for a leaf so he could see what it tasted like! Pesto is one of the most common ways to use a lot of basil. Homemade Ricotta Gnocchi with Pesto is impressive and surprisingly simple to make. This month’s Saveur magazine has a full feature on pesto with a number of delicious recipes, from Pesto-Rubbed Chicken with Panzanella to Crispy Calamari with Pesto Mayonnaise. Caprese Salad is another way to use fresh basil – and it’s a great showcase for perfect tomatoes too!!

Bon Appétit and Enjoy!

Get updates from The Seasonal Gourmet on Facebook and Twitter.  Join the conversation today!

Copyright Trish Coleman. Please contact the author to obtain permission for republication.


Summer Lasagna with Vegetables, Sausage and Pesto

2 08 2011

Summer Lasagna with Vegetables, Sausage and Pesto

Farmers’ markets are at their peak right now and almost anything that grows during the summer is now available. To take advantage of the bounty, why not make this lasagna which is packed full of summer herbs and vegetables? It’s the perfect dish for entertaining because you can assemble it in advance and bake as guests arrive. The various components take a bit of time to pull together but it’s pretty straightforward and the effort is well worth it. The recipe can also be adapted to suit vegetarians.

Summer Lasagna with Vegetables, Sausage and Pesto

Serves 6 to 8

For a vegetarian version, omit the sausage and double the vegetables.

Pesto Sauce:

  • 1 cup loosely packed fresh basil leaves
  • 1 clove garlic
  • ½ cup grated parmesan cheese
  • ¼ cup olive oil
  • Pinch of salt

Sausage and Vegetable Sauce:

  • 3 mild Italian sausages
  • 2 Tablespoons extra virgin olive oil
  • 1 cup diced eggplant (about ½ small eggplant, cut into a ½” dice)
  • 1 cup diced zucchini (cut into a ½” dice)
  • ½ small red pepper, diced
  • ½ small yellow pepper, diced
  • ½ red onion, diced
  • 1 clove garlic, finely minced
  • 1 teaspoon chopped fresh basil
  • ½ teaspoon red pepper flakes
  • 28 fl. oz. (796 ml) can whole tomatoes
  • 5.5 fl. oz. (156 ml) can tomato paste
  • Pinch of sugar
  • Salt to taste

Béchamel Sauce:

  • 5 Tablespoons unsalted butter
  • ¼ cup flour
  • 3 cups whole or 2% milk
  • ¼ teaspoon ground nutmeg
  • Salt, to taste

For Assembly:

  • 3 to 5 fresh lasagna sheets (or more to fit the pan)
  • 5 oz. mozzarella, grated (equals about 1 cup loosely packed when grated)
  • ½ cup grated parmesan cheese

To Make the Pesto Sauce:

  1. In a food processor or processor cup of a hand blender, combine all ingredients and puree until smooth. Refrigerate until ready to use.

To Make the Sausage and Vegetable Sauce:

  1. Remove sausage meat from casings. Heat olive oil on medium-high in a large skillet or enameled cast iron pot. Add sausage meat and cook until just browned, about 7 minutes. Use a slotted spoon to remove sausage from the pan and set aside.
  2. Add eggplant, zucchini, peppers and onion to the pan and cook until beginning to soften, about 4 minutes. Add garlic, chopped basil and red pepper flakes and cook for another two minutes.
  3. Pour in tomatoes and break up with a spoon. Add tomato paste and stir until thoroughly incorporated. Let the sauce simmer for about 15 minutes until it is thick (béchamel can be prepared during this time – see below). Season tomato sauce with a pinch of sugar and salt to taste. Set aside until ready to use. Sauce can be refrigerated up to two days.

To Make the Béchamel Sauce:

  1. In a large saucepan, heat butter on medium-high until just melted. Add flour and quickly whisk into the melted butter. Reduce heat to medium and cook flour mixture for 2 minutes, whisking constantly.
  2. Add 1 cup of milk and whisk until smooth. Cook for 3 to 4 minutes, until mixture begins to thicken and add another cup of milk. Continue until all milk has been added. Add nutmeg and stir to combine. Season with salt to taste and set aside until ready to use.

Assembling and Baking the Lasagna:

  1. In the bottom of a baking pan measuring 7” X 11” X 2” (2 quarts), spread a thin layer of pesto sauce. Cover with a thin layer of tomato/sausage sauce and top with a drizzle of béchamel.
  2. Place a fresh lasagna noodle on top, cutting sheets to fit the pan as necessary.
  3. Repeat the process: pesto, tomato sauce, béchamel, noodles/pesto, tomato sauce, béchamel, noodles/pesto, tomato sauce, béchamel. Top with shredded mozzarella and grated parmesan. Lasagna can be refrigerated until ready to bake, up to two days.
  4. To Bake: Heat the oven to 425 degrees Fahrenheit. Bake lasagna for 20 to 30 minutes, or until the top is bubbling and beginning to brown. Let cool slightly before serving.
Bon Appétit and Enjoy!
Get updates from The Seasonal Gourmet on Facebook and Twitter.  Join the conversation today!

Copyright Trish Coleman. Please contact the author to obtain permission for republication.

This recipe first appeared on Suite 101.com.


When It’s Too Hot to Cook…

20 07 2011

Temperatures are soaring in central Canada

Much of central/eastern Canada and the United States is currently engulfed in a heat wave that looks as though it’s only going to get worse in the days ahead!  Even those of us fortunate enough to have decent air conditioning don’t really feel like turning on the stove.  Standing over a hot grill outdoors isn’t much more appealing. Here are a few of my favourite ‘no-cook’ ideas for keeping the kitchen cool when the temperature soars:

Seafood Salad with Buttermilk-Avocado Dressing – Pick up some cooked seafood at the fish market and pair it with a cooling avocado-based dressing.

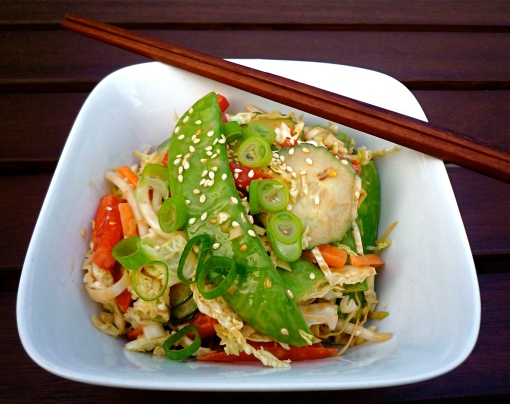
Asian Summer Slaw – Bagged coleslaw makes this delicious Asian-style salad a snap to put together.

Asian Summer Slaw

Crab and Avocado Stuffed Tomatoes – You can make these as hors d’oeuvres or use larger tomatoes for an elegant main dish.

Heirloom Tomato Salad with Goat Cheese and Sherry Vinaigrette – Dress up summer’s best tomatoes with tangy goat cheese and a simple vinaigrette.

Smoked Salmon and Cucumber Salad – Cool crème fraîche and cucumbers are delicious with smoked salmon and fresh dill.

Guacamole with chips – A summer classic. Serve with frosty margaritas!

Guacamole

Caprese Salad – If you have great tomatoes, dinner doesn’t get much simpler than this.

Chopped Antipasto Salad with Italian Vinaigrette – Some Italian favourites – in salad form!

Rotisserie Chicken – Pick up a rotisserie chicken at your favourite deli or supermarket and try these delicious ways to use it.

Duck Confit Salad with Fresh Raspberries – Shredded duck confit and fresh raspberries make an elegant and unusual dinner.

Sandwiches – Use summer’s bounty to make tasty and refreshing sandwiches. Tomato, cucumber, onion and lettuce all pair well with your favourite meats and cheeses.

Peach Tiramisu – An elegant no-bake dessert

Fresh Fruit – One of the best things about summer is that the fruit is so good, it doesn’t require much embellishment. Of course, a little fresh whipped cream on strawberries or peaches never hurt!

Peach Tiramisu

Bon Appétit and Stay Cool!

Get updates from The Seasonal Gourmet on Facebook and Twitter.  Join the conversation today!

Copyright Trish Coleman. Please contact the author to obtain permission for republication.


Old Fashioned Lemonade

17 07 2011

Freshly squeezed lemonade is a great way to beat the heat!

We’ve been experiencing a bit of a heat wave in Southern Ontario and it’s the type of weather that calls for an ice cold glass of lemonade. A couple of years ago I featured a recipe for Tuscan Lemonade that has been quite popular. However, because it has liquor in it, obviously it’s not suitable for children. This family-friendly recipe will appeal to everyone (and you can always add a splash of your favourite bourbon, rum or vodka if you’re entertaining!).

I prefer a lemonade that is quite tart and bold – you can always adjust the amount of sugar and water slightly to taste. I used quite large lemons – if you can only find smaller ones, use a few more. Small inexpensive juicers can be found at most kitchen stores or you can squeeze them by hand but it may take a while!

Old Fashioned Lemonade

Makes about 8 cups

  • 12 large lemons (for three cups of juice)
  • 1-1/2 to 2 cups white sugar (to taste)
  • 4 cups cold water
  • 1 tray of ice cubes (about 14 cubes)
  1. Juice eleven of the lemons – they should yield about 3 cups of lemon juice. Pour the juice into a large pitcher through a strainer to get rid of any seeds and pulp.
  2. Slice the remaining lemon into slices and remove any seeds. Set aside.
  3. Stir 1-1/2 cups of sugar into the lemon juice until it fully dissolves. Add the water and stir to combine. Adjust the sugar and water to taste if necessary.
  4. Empty a tray of ice cubes into the pitcher and add the lemon slices.

Enjoy!

Get updates from The Seasonal Gourmet on Facebook and Twitter.  Join the conversation today!

Copyright Trish Coleman. Please contact the author to obtain permission for republication.


Garlic Scape Butter

8 07 2011

Garlic scape butter

A couple of days ago I wrote about finding garlic scapes at a farmers’ market in Bala, Ontario. I prepared a delicious and simple pasta dish with some of them but there were still a few scapes left over. At $1 for a good sized bunch of scapes, they’re a pretty good deal!

I decided to make some garlic scape butter and used it to make garlic bread to accompany the pasta. It only takes a minute to whip up and is very versatile. In addition to broiled garlic bread, you could use the butter on corn-on-the-cob, to finish steamed or grilled vegetables, with pan sautéed fish, on baked potatoes or just serve it with plain bread.

Garlic bread made with garlic scape butter

Garlic Scape Butter

Makes about 1/3 cup

  • 1/4 cup unsalted butter at room temperature
  • 3 garlic scapes, each about 20″ to 23″ long – discard the flowering ends and cut the scapes into 1″ pieces
  • 1 oz. (28 grams) parmesan cheese, grated (will equal about 1/4 cup once grated)
  • 1 Tablespoon fresh lemon juice or dry white wine
  • Pinch of cayenne pepper, to taste
  • Salt, to taste
  1. In a food processor or the chopping cup of a hand blender, add all ingredients. Pulse until the butter is smooth and the ingredients are thoroughly combined, stopping to scrape the sides with a rubber spatula as nessecary.
  2. Butter will keep covered in the fridge for a few days.

To make garlic scape bread:

  1. Slice a baguette or ciabatta loaf lengthwise down the middle. Spread a generous amount of butter on each half. Heat the broiler and place the oven rack in the highest position.
  2. Place the buttered bread slices on a baking sheet and broil until browned and bubbling (watch carefully – it only takes about a minute!).

Bon Appétit and Enjoy!

Get updates from The Seasonal Gourmet on Facebook and Twitter.  Join the conversation today!

Copyright Trish Coleman. Please contact the author to obtain permission for republication.

Ciabatta loaf with garlic scape butter


Pasta with Bacon, Peas and Garlic Scapes

6 07 2011

Garlic scapes at the Bala Farmers' Market

It’s finally July – the month when the summer markets really start to hit their stride. I’ve been lucky enough to spend a bit of time traveling over the past few weeks, including spending a wonderful few days in the beautiful Muskoka region of Ontario. One of my favourite things about driving through rural areas in the summertime is stopping at roadside markets and fruit stands. As luck would have it, the community of Bala was having a farmers’ market the day we were there so of course, I had to check it out.

In addition to strawberries, asparagus, peas, blueberries and rhubarb, I was excited to see garlic scapes at the market. Garlic scapes are the tops of the garlic plant and can sometimes be found at farmers’ markets in last spring and early summer (unfortunately, you probably won’t see them at supermarkets). They are long and curly and have a sweet, garlicky flavour. Scapes are very versatile and can be used like garlic in dishes such as stir fries, egg dishes, pastas and salads. They can be cooked or eaten raw and you can use the flowering ends as garnish.

Fresh peas are another early summer favourite of mine. They add a sweet burst of flavour to dishes or can be eaten simply cooked with a dash of salt and a bit of butter. The key to fresh peas is to cook them quickly and simply (they are also delicious raw) so don’t overcook them! When shelling peas, discard any peas that have grown large and have split – I find they can have a slightly off, ‘metallic’ flavour. Unfortunately, peas aren’t terribly efficient: I shelled 45 pods to yield just under a cup and I found a few pods with only one pea in them! However, their delicate flavour it worth the effort if you’re looking for a taste of summer. You can always use frozen baby peas to save time. Avoid canned peas – they don’t have the right sweetness or texture!

Cosmo's Smoked Meats - they make a fantastic dry smoked back bacon

A Few Helpful Tips:

  • This recipe is all about the quality of ingredients so use the best you can find. The sauce lightly coats the noodles – it’s not drowning in sauce. You can reserve a bit of the pasta cooking water before draining to add to the pasta if it looks a little dry. The entire dish comes together very quickly once you have your ingredients prepped.
  • I used a dry smoked back bacon from Cosmo’s Smoked Meats and it had a nice dry texture and smoky flavour. You can use any kind of double smoked slab bacon or smoked ham. Of course, regular strip bacon will work in a pinch but won’t have quite the same flavour or texture.
  • I also used fresh fettucine from the refrigerated case at the supermarket. For 500 grams/1.1 lbs. of fresh pasta you can substitute about 8 to 10 oz./226 to 284 grams dried pasta of any shape you prefer.

Pasta with Bacon, Peas and Garlic Scapes

Makes about 4 to 5 servings

  • 1 lb. (500 grams) fresh long pasta such as fettucine or linguine (or use 8 to 10 oz./226 to 284 grams dried pasta)
  • 1 Tablespoon olive oil
  • 5 oz. (142 grams) smoked slab bacon or smoked ham, cut into a 1/2″ dice
  • 3 garlic scapes, each about 23″ long, chopped – reserve the flowering ends as garnish
  • 3/4 cup fresh shelled peas (from about 40 to 45 pods)
  • 1 cup chicken broth
  • 2 Tablespoons unsalted butter
  • 1 oz. (28 grams) parmesan, grated (will equal about 1/4 cup packed when grated)
  • Salt and pepper, to taste
  1. Heat a large pot of water to cook the pasta. While the water is heating, prepare the rest of the ingredients.
  2. In a large skillet, heat the olive oil on medium-high. Add the bacon or smoked ham and brown until slightly crisp around the edges, about two to three minutes (if you’re cooking raw bacon, it will take a bit longer). Remove from the pan and set aside.
  3. Put the pasta into the boiling water to cook according to package directions. Drain once cooked.
  4. Add the chopped garlic scapes and peas to the skillet and sauté for one minute. Pour in the chicken broth and cook for another minute. Add the butter and stir until melted and return the bacon to the pan.
  5. Add the cooked pasta to the skillet and toss until the pasta is thoroughly coated. Stir in the grated parmesan and season with salt and pepper to taste. Garnish with a garlic scape if desired. Suggested accompaniment: Bread with Garlic Scape Butter.

Pasta with Bacon, Peas and Garlic Scapes

Bon Appétit and Enjoy!

Get updates from The Seasonal Gourmet on Facebook and Twitter.  Join the conversation today!

Copyright Trish Coleman. Please contact the author to obtain permission for republication.


Sully’s Favourite Strawberry Shortcake

27 06 2011

When local strawberries appear at the markets, why not make strawberry shortcakes?

It’s finally summer!  When I was a kid, the beginning of summer meant the end of school, warm days at the beach and the start of strawberry season. My grandfather, Ralph (Sully) Sullivan had a camp on Washademoak Lake in New Brunswick and we would pick strawberries nearby. One of his favourite desserts was strawberry shortcake and my mom would whip up some biscuits and whipped cream to enjoy with the freshly picked berries. There is a reason why it’s a classic dessert – the combination is unbeatable!

Sully’s Favourite Strawberry Shortcake

Makes 6 shortcakes (there will be extra biscuits so just prepare more strawberries and cream for a larger yield)

Biscuits:

Makes 12 to 15 small biscuits – extras can be frozen

  • 2-1/4 cups all purpose flour, plus extra for dusting the countertop
  • 4 teaspoons baking powder
  • 1/4 teaspoon salt
  • 3 Tablespoons sugar
  • 5 Tablespoons cold unsalted butter
  • 1 large egg
  • 3/4 cup milk or buttermilk

Strawberries:

  • 6 cups fresh strawberries, hulled and halved
  • Sugar, to taste

Whipped Cream:

  • 1-1/2 cups whipping cream (35% M.F.)
  • 2 Tablespoons sugar, or to taste
  • 1/2 teaspoon vanilla

To Prepare the Biscuits:

  1. Preheat the oven to 450 degrees Fahrenheit.
  2. In a large bowl, add flour, baking powder, salt and 2 Tablespoons of the sugar. Stir until thoroughly combined.
  3. Using a wire pastry cutter (or two sharp knives), cut the cold butter into the flour mixture until the mixture resembles small pebbles.
  4. In a measuring cup, add the egg and milk and whisk together with a fork until smooth. Pour the milk/egg mixture into the dry ingredients. Stir briefly until it just comes together as dough.
  5. Sprinkle a small amount of flour onto a clean countertop or pastry board. Turn the dough out onto the counter and gently knead for about ten seconds. If the dough is very wet, add a bit more flour.
  6. Gently pat the biscuit dough into a circle about 2 inches (5 cm) thick. Using a cookie cutter or the top of a wine glass, cut the dough into 2″ circles. Re-shape the leftover dough and cut out more biscuits.
  7. Place the biscuits in a pie plate so they’re just touching each other. Sprinkle the tops of the biscuits with the remaining tablespoon of sugar. Let the biscuits rise at room temperature for 10 minutes.
  8. Bake the biscuits for 12 to 15 minutes in a 450 degree oven or until the tops are browned.
  9. Extra biscuits can be frozen and thawed at room temperature before using. (They’re also great with jam for breakfast!)

To Prepare the Strawberries:

  1. In a large bowl, add the berries and sugar to taste (the amount will depend on how sweet the berries are). Let the mixture sit at room temperature for about 15 minutes before using. Note: You can mash them slightly with a potato masher if you prefer a juicer sauce.

Whipping the Cream:

  1. Place a metal or glass bowl (do not use plastic) and beaters in the freezer to chill about 30 minutes before beating the cream.
  2. Just before assembling the shortcakes, remove the bowl and beater from the freezer and pour the cream into the bowl. With a stand mixer or hand mixer, whip the cream on high until it begins to froth.
  3. Pour in the vanilla and add the sugar, one teaspoon at a time, while continuing to whip. Continue whipping the cream until it forms still peaks. Do not over beat.

To Assemble the Shortcakes:

  1. Split six biscuits in half through the middle and place the bottom of each in bowls. Spoon a half-cup of the sweetened berries over each biscuit bottom.
  2. Place the top of the biscuit on the berries and top with another half-cup of the strawberries.
  3. Spoon a generous dollop of whipped cream over each serving. Garnish with a strawberry if desired.

Bon Appétit and Enjoy!

A version of this recipe first appeared on Suite 101.com.

Get updates from The Seasonal Gourmet on Facebook and Twitter.  Join the conversation today!

Strawberry Shortcakes are a summer classic


Seafood Salad with Avocado-Buttermilk Dressing

25 05 2011

Shellfish at the market

As the weather warms up, many of us are looking for fresh meal ideas. A simple salad of chilled seafood topped with an easy avocado and buttermilk dressing makes an elegant lunch or light dinner. It can also be served in smaller portions as a starter course. Many fish markets sell lobster, shrimp and crab that have already been cooked which makes this a snap to pull together. Make sure you select an avocado that is very ripe – I often plan ahead and buy my avocados a few days before I need them because the ones at my local store are usually under ripe and as hard as rocks.

About Buttermilk

Traditionally, buttermilk was the liquid that was left after making butter. Today, most buttermilk sold in supermarkets is made by adding lactic acid bacteria culture to pasteurized milk. Buttermilk is tangier tasting and slightly thicker than regular milk. Full-fat and lower-fat options are available in the dairy section of most grocery stores and it is sometimes sold as a powder in the baking section. However, if buttermilk is not available, a decent substitute is to stir one tablespoon of fresh lemon juice into one cup of milk. Let the mixture sit for five minutes and stir until smooth. Sour cream or plain yogurt will also work – mix with a small amount of milk to thin it.

Seafood Salad with Avocado Dressing

Makes 4 light servings

  • About 16 oz. cooked seafood such as lobster, shrimp or crab (or a mix of all three)
  • 4 cups butter lettuce leaves
  • 20 cherry or grape tomatoes, halved
  • Fresh chopped chives as garnish
  • Dressing (see below)

Avocado-Buttermilk Dressing:

  • 1 very ripe avocado
  • 1 clove garlic
  • 6 Tablespoons 1% buttermilk (or buttermilk substitute – see above)
  • 3 Tablespoons Hellman’s or Best Foods style mayonnaise – regular or light
  • 2 teaspoons fresh lemon juice
  • 1 Tablespoon apple cider vinegar
  • 3 teaspoons chopped chives
  • Very finely diced shallot
  • Salt, to taste

To Make Dressing:

  1. Cut the avocado lengthwise through the middle and pull the two halves apart. Remove the pit and discard. Scoop the avocado into the bowl of a food processor or processor cup of a hand blender.
  2. Add the garlic, buttermilk, mayonnaise, lemon juice, cider vinegar and two teaspoons of the chives to the avocado. Puree the mixture until smooth.
  3. Transfer dressing to a bowl and stir in the remaining chives, diced shallot and season with salt to taste.
  4. Use as a dip or dressing. It will keep covered in the fridge for a couple of days.

Plating the Salads:

  1. Place a bed of lettuce on each of four salad plates or one big serving plate. Top with cherry tomato halves. Set cooked seafood on top of the lettuce and tomatoes, arranging it so it looks attractive.
  2. Drizzle with avocado-buttermilk vinaigrette and garnish with fresh chopped chives.
Bon Appétit and Enjoy!

Seafood Salad with Avocado-Buttermilk Dressing

Get updates from The Seasonal Gourmet on Facebook and Twitter.  Join the conversation today!

Copyright Trish Coleman. Please contact the author to obtain permission for republication. This article first appeared on Suite 101.com.